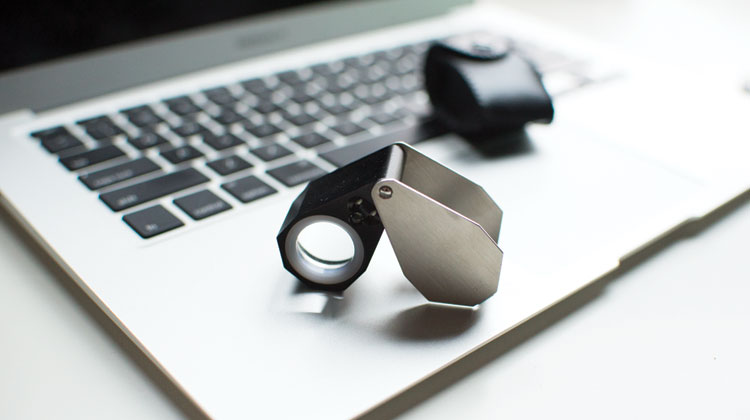
 This tutorial is going to cover what a loupe is, what it is used for, and how to use one. A jeweller’s loupe is essentially a type of magnifying device. It is used to inspect the laser inscription, and to look for inclusions and blemishes both for verifying the clarity grade and for identification.
It can also be used to check for proportions and optical symmetry, once you get good at using one. Finally, if you own a loupe, you can use it to ensure that you’ve done an excellent cleaning job, to inspect the prongs, and to check the girdle for any wear and tear.
If you’re set on a very thorough diamond search, you’re going to want to learn how to use a loupe properly so that you can quickly assess any diamond you come across in person.
Learning how to use a loupe is important because you won’t likely find an idealscope or an ASET available at most jewelry stores, but you can be sure that all jewellers will carry a loupe. Also, whether you bring your own or borrow one, you can be sure that your skills with a loupe will go a long way to make the sales person think twice before they try to rip you off.
Types of Loupes
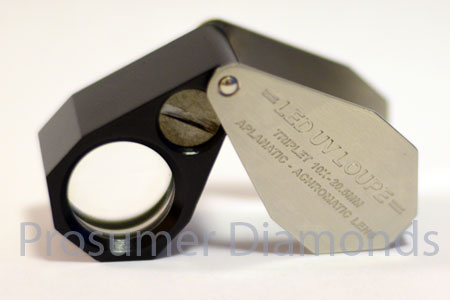
A loupe is usually handheld and at 10x magnification power. They also come in higher power of magnification, even up to 30x, but it’s useful to remember that diamond grading is done under 10x. There are cheap loupes for a few dollars and there are more expensive loupes that are around $30. In general, the more complicated a loupe’s construction, the more expensive it will be.
You may be tempted to purchase a 30x loupe because it seems like it will be easier to spot those tiny inclusions. However, the problem with higher power lenses is that it usually has a trade-off where the focal length is reduced and you get a very narrow field of view so that it is actually quite difficult to inspect a diamond under 20x or 30x power.
You will also come across different diameter lenses. Popular sizes are 18mm and 21mm. A larger lens means more light can enter the lens giving better image quality and it will give you a bigger picture as well.
It helps if you know a bit about photography to understand how a loupe works. But generally a lens needs sufficient light to produce a better quality image. This is another reason why higher power loupes are not necessarily your preferred choice. When you have to put the lens really close to the object you want to focus, the lens will be blocking much of the light that is needed. You may want to find a loupe that has LED lights surrounding the lens.
There are different types of loupes that are constructed with different number of lenses. The more common ones you will come across are doublets and triplets. Cheaper doublet lenses are made with a single optical element, meaning that it is a single piece of glass.
You should look for loupes with a triplet lens that is constructed with three optical elements compounded together. The reason why you want a compound lens with multiple optical elements is because more lenses allow better correction of what are known as ‘aberrations’, another word for distortion of the image that the lens is trying to reproduce.
Sometimes, a loupe will be labelled as a triplet but actually only has a single optical element. You should be careful when purchasing a cheaper loupe from an untrusted source that claims to be a triplet if you can’t open it up and inspect the separate elements.
Spherical Aberration
One type of aberration is known as spherical aberration. Simply put, if a lens is curved like a sphere, the result is that there will be a variation in the focal length across the lens so that there isn’t a single clear focus point. When this happens, the result is a blurred image being seen through the lens. In order to correct this, you want to make sure that the lens in your loupe is an aspheric lens. You may not find this description on a lens, but you may find that it will say that it is an aplanatic lens, which means that spherical aberration is minimised.
Chromatic Aberration
Another type of aberration is chromatic aberration. Where you might want to maximise dispersion in a diamond, you want the opposite in a lens. It is the dispersion of the lens that causes chromatic aberration. Chromatic aberration is also known as color fringing. There are several possible ways to minimise dispersion in a lens. You can either put two materials together with a different dispersion index to try to cancel the effect, or you can use a material with lower dispersion. Finally, there are special coatings to reduce this type of aberration. What you want to look for is a description that the loupe you use has an achromatic lens that has a special coating.
How to Inspect a Diamond with a Loupe
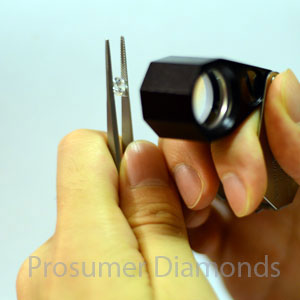
The proper way to use a loupe is to hold the loupe close to your eye with your hand making contact with your face. With the other hand, you can hold the ring or the loose stone in the tweezers and bring the diamond into focus. You will want to flip the diamond on it’s table and then you can easily clamp it by the girdle. If you find that you have trouble holding the diamond, there are self-locking tweezers that make it easier for you to handle the diamond.
When you have the diamond secure, form a bridge between your two hands and your face for stability. You should be able to move the diamond in and out in order to change the focal point. Put your elbows on a table in order to further steady yourself when you are just starting out.
When you purchase a diamond, the first thing you want to do is to use a loupe to verify the laser inscription. Hold the diamond by the table and culet and turn the diamond until you can spot the inscription. This is one of the more difficult things to do with a loupe and reading the first few numbers and the last few numbers is usually sufficient for identification from a trusted source. One thing to be careful of is to be gentle with the tweezers whenever you hold it against the culet, although diamond is very hard, a pointed culet is very fragile and you do not want to damage the diamond.
If you are assessing clarity, the first thing you want to do is have the diamond cleaned thoroughly to remove as much dust and oil as you can. When assessing clarity, it helps if you inspect each facet one by one. Try to find a characteristic inclusion; you can start from that facet. It helps to count the number of facets; for example, there are 8 crown facets so you will want to count them one by one so you remember where to finish.
You want to start by focusing the surface of the diamond to check for blemishes. The way to tell an inclusion from dust or other marks on the surface is to change the focus. An inclusion will only come into focus when other surface features are out of focus. You can also tilt the stone so that the light glances off of it and you can see certain surface features more clearly. The same thing goes for certain inclusions. Rock the diamond around at every angle to be sure you’re checking for everything.
When you inspect a diamond at home, you can try to inspect a diamond using a technique known as ‘dark-field illumination’, which is usually the lighting set up when using a microscope to inspect clarity. However, I have found that you can use a similar setup at home in a dark room using any number of portable light sources that you can have shining at the diamond from the side.
Conclusion
When you are first starting to use a loupe, it helps a lot to take your time and be calm and systematic. Definitely familiarise yourself with using a loupe before trying to inspect diamonds in person in a jewellery store. The takeaway from this tutorial is that whenever you use a loupe, make sure that it is aplanatic and achromatic. If you want to check for clarity, use a 10x loupe so that you are in line with the grading standards. Practice makes perfect and the more you use a loupe, the better you will be at it and the faster you can use it to identify the inclusions in a diamond.
Don’t be put off if you find it difficult at first, many people can’t even spot a small white crystal in a VS1 diamond that is in the center of the table. The thing is, once you know where the inclusions are in your diamond, you can easily identify it if you ever take it in to have a cleaning or for any maintenance or repair work. It helps give you just that much more peace of mind.
If you’ve spent all this time finding your perfect diamond, a loupe will help you appreciate those things you can’t normally see. But just knowing where to look will also make you see your diamond differently without the loupe. What used to be eye-clean may no longer be eye-clean. This is why I advocate getting a higher clarity stone in the VS range if you plan on purchasing a loupe to appreciate your diamond up close.


