Today I’m going to be discussing diamond photography. I’m also going to be having some fun trying to take pictures of my fiancé’s diamond ring to see how difficult it really is to get a decent picture. The aim of this tutorial is to help you understand how to take a picture of a diamond, what works and what doesn’t work. In doing so, I hope that it will also help you better evaluate the diamond images you see online and also understand and appreciate the effort online vendors go through to deliver that perfect picture.
The focus of this tutorial will be on taking pictures of the actual image of a diamond. In the next tutorial, I will be discussing how to take idealscope, ASET, and hearts images so stay tuned for that.
General Photography Tips
I am not a professional photographer, but as an enthusiast I know that diamonds are notoriously difficult to photograph. One reason is because they have different personalities under various lighting conditions. In photography, we refer to light sources as directional or non-directional, hard or soft. One of the best kind of light to photograph your diamond will be with non-directional soft lighting. You get close to this type of lighting under indoor diffuse lights such as office fluorescent lighting.
In diamonds, we see more brightness and contrast under indirect lighting and diffuse lighting and we see more fire and sparkle scintillation under direct lighting or spot lighting. When purchasing diamonds, the actual image you are most familiar with seeing from online vendors is an image taken of the diamond showcasing the diamond’s brightness and contrast. There is good reason for this.
If you tried to take a picture of a diamond sparkling, you will probably be disappointed that the picture doesn’t capture what you see with your own eyes. The simple reason for this is that sparkle scintillation is something that is dynamic and a picture freezes a moment in time so that it is not possible to view scintillation in an image. You will also notice that under direct lighting, a diamond will darken at the same time giving off flashes of colored light. But in a picture, you will likely capture a couple broad flashes of light, several pin flashes of light, and the rest of the diamond is generally dark giving what appears to be a rather dull image.
I think by far the most difficult thing in photographing a diamond for assessment is how to get everything perfectly level. If you’re taking a picture of a single diamond, then the best way to do this is to use a tripod and to check that both the diamond and the camera lens is level, or at least parallel to each other. Not only does the lens have to be level, it has to be centered on the diamond. In my previous tutorials, I’ve already talked about how even 1 degree of camera-tilt can affect the light performance images of diamonds. Getting the diamond and the camera lens to be perfectly level can take a lot of time and adjustment.
For vendors taking pictures of many different shapes and size of diamonds, they must have specialised and highly adaptable photography setups that are especially built for their business. The costs and difficult of building such a set up and hiring a full-time photographer is the reason why you don’t see a lot of super high quality images around.
Enhancing the Picture
There is a difference between trying to take a picture to assess a diamond’s characteristics and taking a picture for a commercial advertisement. In the latter case, there are many things you can do to make a diamond appear nicer than it truly is by careful control of angles, lighting, exposure, filters, focus, etc. Of course, an appreciation of how the diamond reflects and returns light is key to taking a good picture.
I’m going to be making a distinction between enhancing a photograph such that the picture reflects reality better and materially changing the diamond’s characteristics in post-processing.
Unfortunately, most of the diamond pictures you see online are from vendors who have the objective of selling you that diamond. The photography set up is likely going to be one that tends to enhance the good characteristics and hides the bad. It is not designed to make my job easier to sort through the good and the bad. If it were, then all diamond pictures would be taken against a red background that would allow leakage to be clearly visible in the diamond. In reality, diamonds are usually set against a neutral grey or black background. A grey background will tend to hide light leakage and a black background will make color more difficult to assess.
In commercial diamond photography, jewellery pieces can be propped up with wax on a piece of black acrylic to add glamour. At home, you can try to use flowers or other interesting objects as props if you’re going for that aesthetic look. Another way to enhance a diamond’s picture is by artificially making the arrows stand out using a black piece of card around the camera lens.
In well-cut diamonds, this can help give a picture a more attractive contrast pattern. However, in diamonds that have obstruction issues, this could have the adverse affect of making the diamond appear darker than it normally would be viewed in. You can spot these cases where you have access to idealscope and ASET images and they don’t show obstruction issues whereas the actual image of the diamond seems to be darker.
Although some of the methods above make some of the flaws in diamonds less noticeable, they don’t go far as to materially change the diamond’s characteristics. What I have more of a problem with is using special lights that contain more ultraviolet light to alter the color of a diamond, or to correct the color in post-processing rather than simply correcting for exposure. It is difficult to assess whether this has been done to an image and this is why you need to always buy from reputable vendors. The only way to tell that this isn’t done is to compare many different pictures of diamonds taken with the same photography setup.
Other things I have noticed are that diamond images are blurred on purpose to hide inclusions and problems with optical symmetry. Some diamond images are even cropped in a way that doesn’t show the part of the diamond that has a significant flaw.
The light performance images such as idealscope and hearts images are actually much more susceptible to tampering. I will be looking into this more in the next tutorial.
With the prevalence of online purchasing of diamonds, there is an increasing importance in the quality of diamond images and I have often heard that a diamond is only as good as its picture. It is a shame that there are many diamonds that may look perfectly fine in reality but don’t take a very good picture.
The flip side to this is that as an online consumer, with the choice of choosing a diamond that does look good under close examination and photography, why would you not choose one that takes a good picture over one that doesn’t? After all, you may want to take a picture of your diamond ring too one day.
Good optical symmetry in a diamond is very important if you want to take a picture of the diamond face-up. Large lower girdle variations in combination with longer star facets is typical of causing non-uniform hotspots around the table reflection that is not aesthetically pleasing. Overly thin arrows from lower girdles that are too long also don’t look good. Too large a table causes overly large table reflections that don’t look good.
These issues may not affect how the diamond appears to your eyes when you’re looking at it sparkle but they certainly play a much bigger role in a photograph. In the following section, I will be conducting a test to see how difficult it is to take a picture of a diamond at home and how difficult it is to produce reliable imagery that is suitable for online assessment.
The Test
In this test, I am going to see how easy it is to take decent pictures of your diamond at home. I’m going to explore using different types of cameras and seeing what kind of pictures we can get.
Using the techniques mentioned earlier, I am going to try to take pictures demonstrating brightness, contrast, and sparkle. Unfortunately, I don’t have access to stones of many different colors so this test is not meant to evaluate the effects on color. For now, I am simply going to be focusing on whether I can get a nice shot off!
The 5 cameras I will be using for this test are the following:
- iPhone 4 (an average camera phone)
- iPad 3 (tablet)
- Sony DSC-TX9 (point and shoot)
- Nikon D5100 with a kit 18-55mm f3.5-5.6G (cropped sensor DSLR with cheapo lens)
- Nikon D600 with a 24-70mm f2.8G (full frame DSLR with pro lens)
(Update: Since the writing of this article, I have purchased an extension tube and led ring flash and used them to take some macro shots so if you want to see the difference in image quality then scroll to the end of the article.)
The images below are presented in the same order. At this time I don’t own a macro lens, close-up filter, or extension tubes so I will try my best with what is available. All of the pictures are taken at the same time of day in .jpg format and simply cropped with no further color correction. I have also not used any kind of filter but have used a tripod when possible.
Brightness and Contrast
(as viewed from the indirect sunlight of a north-facing window)
iPhone 4 – front camera
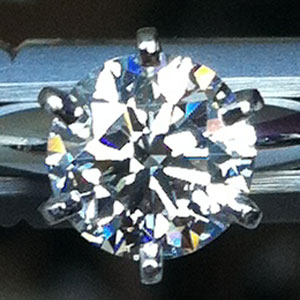
iPad 3 – front camera
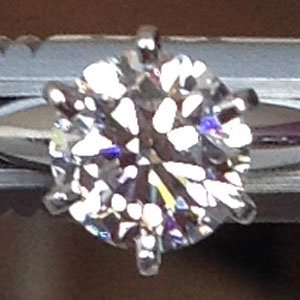
Sony DSC-TX9 (Point and shoot)
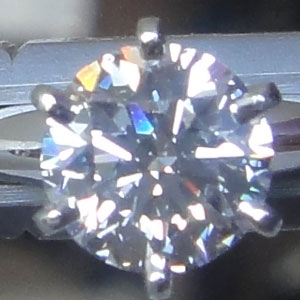
Nikon D5100 APS-C sensor with kit lens
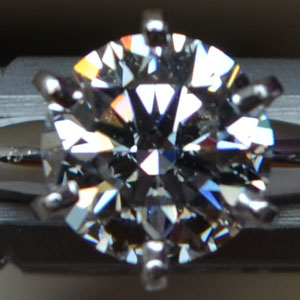
Nikon D600 Full-frame sensor with 24-70mm f2.8 lens
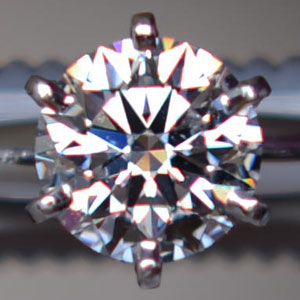
Sparkle
iPhone 4 – front camera
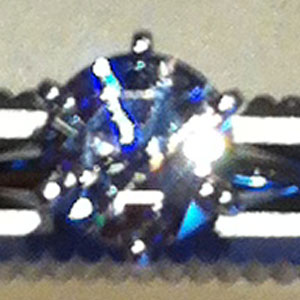
iPad 3 – front camera
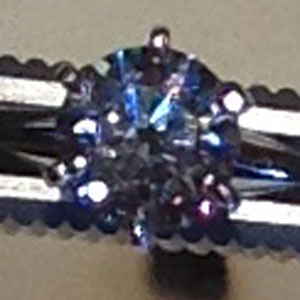
Sony DSC-TX9 (Point and shoot)
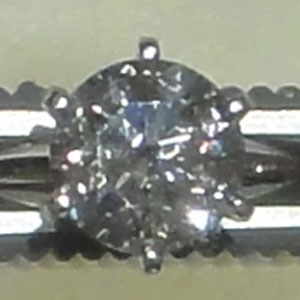
Nikon D5100 APS-C sensor with kit lens
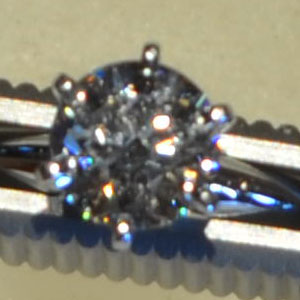
Nikon D600 Full-frame sensor with 24-70mm f2.8 lens
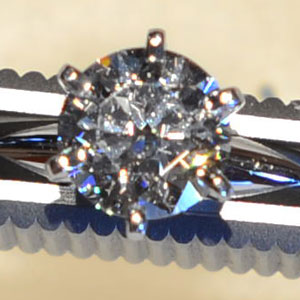
Analysis
So as you can see from the series of images above, it is not possible to capture sparkle scintillation in a picture. It is only possible to capture individual flashes and any diamond will be able to give off such flashes and is more influenced by lighting. The images above were used with a single small spotlight that was from a ceiling while I placed the diamond near the floor. The point is that images of sparkle are not reflective of true light performance.
The images of brightness and contrast give a better sense of the true performance of the diamond but you can see how the type of camera and quality of the image really makes a big difference to our ability to assess the diamond. To me, the iPhone and iPad pictures seem to fair better than the point and shoot camera for giving a general idea of the light performance of the diamond. Although in terms of sharpness, you seem to get what you pay for and the images taken with the DSLRs are heads and shoulders above the rest as you would expect. But even with a very sharp image taken with a professional camera and lens, the images are still not suitable for online assessment.
In order to do this, first the diamond should be out of the setting as the prongs have a significant effect on the diamond’s light performance. The loose stone should then be propped up or resting against something that allows the image to be taken perfectly level. Most importantly, the lighting has to be adjusted so that the light falling on the diamond is even and non-directional. In other words, the images must be taken essentially in a studio setup using carefully positioned light sources and a light tent/box.
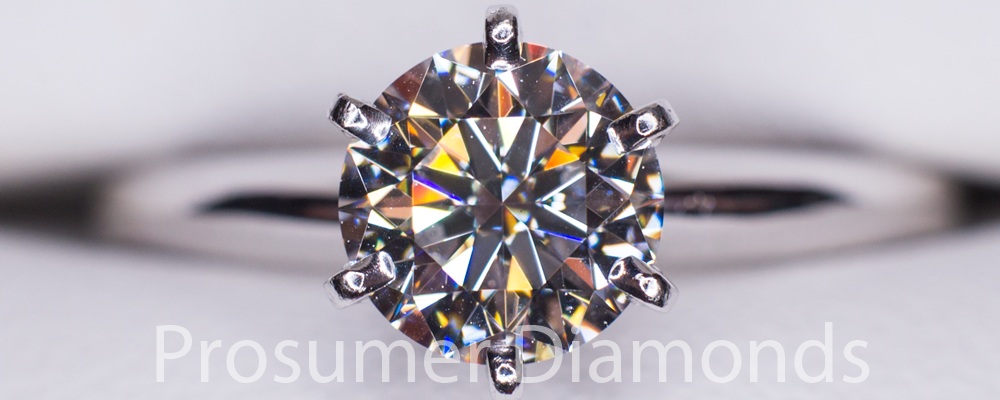
Update: The frustration of not getting a satisfying shot made me go out and purchase an extension tube for my camera and a DIY led ring flash. It won’t give me a soft brightness/contrast effect but it will be great for showcasing the fire in the diamond. Here is what it looks like!

As mentioned, I used a tripod, extension tube, and led ring flash to produce this image. I simply had the ring in it’s box and didn’t spend too much time trying to get it level with the lens as I was going for a more aesthetic shot so there is a bit of tilt. The image was shot in raw, and I adjusted for exposure and tone in Adobe Lightroom to make the image reflect reality better. I then cropped it to 1000×400 pixels and saved as a 24 bit .png file in order to maintain the high definition.
For anyone undecided about VS sized inclusions, you can actually see quite clearly the dust particles that are present even after good cleaning and their size compared to the tiny dark inclusion under the table in the 4 o’clock position. It was only in this high-definition image that my fiancé first saw the inclusion that makes her diamond a VS1. Once you know where to look, I could spot the inclusion in the image even on my iPhone. However, it was impossible for me to spot this inclusion no matter how hard I try with my unaided eye.
Conclusion
What I wanted to demonstrate in this article was what to expect when taking pictures of your diamond ring at home and manage your expectations, as you compare it with the pictures that you have seen from the vendor online. I also wanted to show you why it is necessary for us to refer to light performance images. In the next tutorial, I will be focusing on idealscope, ASET, and hearts images using the same cameras and show you what works the best and the result is surprising!
If you’re having trouble getting a decent picture of your diamond with your camera-phone or point and shoot camera, don’t blame yourself. My own tests have shown me just how difficult diamond photography is and if I ever have a chance to get some macro photography equipment I will be sure to revisit this topic again to show you guys the difference.