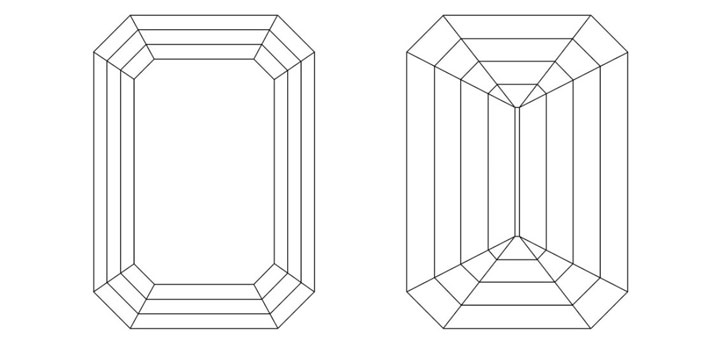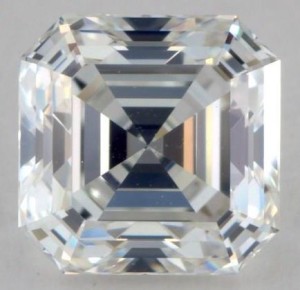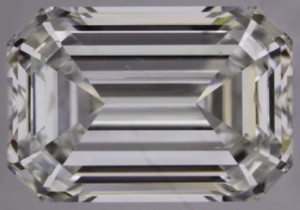
The classic emerald cut is a rectangle with beveled corners but you can also find square emeralds, which are also known as Asschers. The emerald and Asscher cuts belong to a family of cuts called step-cuts, which refers to the multiple steps of crown and pavilion facets on an emerald cut gem. These extra facets create a house of mirrors effect and increases the number of internal reflections in an emerald to improve color retention.
The standard emerald cut has 58 facets and consists of a table facet, a 3-step crown and 4-step pavilion with 8 facets on each step, and a culet. Although an emerald cut diamond is less brilliant than most other cuts, it has long facets that give it an elegant brilliance. Its large crown facets can also give off blinding flashes of fire when it catches light at the right angle.
The Asscher Cut
GIA describes the original Asscher Cut as a cut-cornered square emerald. The cut was developed in 1902 by a diamond cleaver named Joseph Asscher who famously cleaved the largest rough diamond ever recovered, the Cullinan diamond.
In 1920, the Asscher Cut was modified to have large corners, a built-up crown, and a small table. This variation of the Asscher Cut has become one of the most popular cuts among estate diamond dealers.
During the Second World War, the patent held by the Asscher family for the original specifications of the Asscher Cut expired. Because of this and the popularity of the cut, there became widespread adoption of cuts that were similar to the original Asscher cut.
However, unlike the original Asscher Cut, most of these diamonds were cut with small corners and large tables to save weight in order to maximize profit rather than to maximize the beauty of the diamond. These diamonds lacked fire and looked very ‘cold’.
Today, the Asscher family’s company is known as the Royal Asscher Diamond Company, and is currently run by Edward and Joop Asscher. In 2001, the brothers introduced the Royal Asscher, the third generation of the Asscher Cut, the patent for which the company now holds. The Royal Asscher has 74 facets with a 3-step crown and a 5-step pavilion.
The aim of this new cut was to leverage modern technology to improve the brilliancy of the Asscher Cut from the 1920s. The new cut recreated the ‘warmth’ that the original Asscher was known for. This warmth refers to the large amounts of fire the diamond gives off and does not have anything to do with the color of the diamond.
In more recent years, a diamond prosumer by the name of Karl K. designed his own variation of the Asscher Cut that he called the Octavia Asscher diamond. Karl, who is now a professional diamond designer, partnered with Israeli cutter Yoram Finkelstein to turn the stone into a reality. The Octavia is a 74-facet diamond with a 3-step crown and a 3-step pavilion. If you want one, you can find them being sold by Good Old Gold. GIA describes these new variations of the Asscher Cut as modified octagonal step cuts.
How to Pick an Emerald Cut Diamond
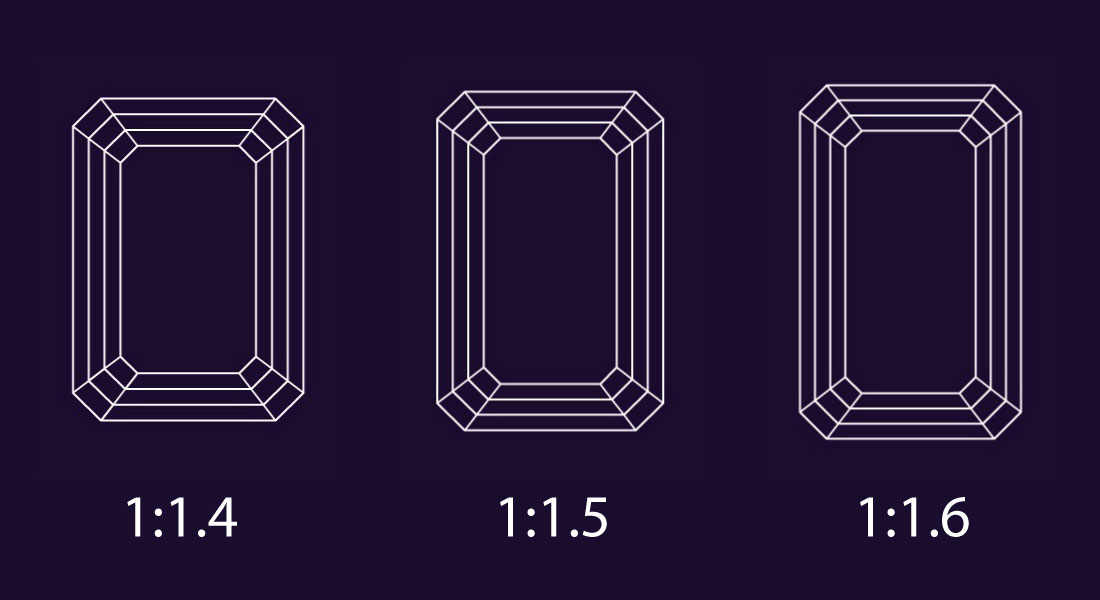
The most defining thing about an emerald cut diamond is its outline, which is determined by the length to width ratio. If you’re looking for a square-cut emerald, you want the L/W ratio to be within 1.05.
A balanced L/W for a classic emerald cut is between 1.5 and 1.55. If you want a fatter looking emerald, then choose a L/W that is closer to 1.45. For a thinner emerald, then you can consider a L/W closer to 1.6. Whatever your preference, choosing the most pleasing outline to you should be the first step in choosing an emerald cut diamond.
Contrast
If you have a large list of diamonds to choose from, it is more efficient to filter using the table, depth, and symmetry of the stone. But if you’re starting with a shortlist or you’ve already applied proportion filters, then evaluating the contrast pattern of the stone will help you narrow it down further.
Contrast helps create sparkle, which is what you ultimately want to optimize. The sparkle of an emerald cut diamond is subtle and the elegance of the emerald cut diamond really depends on having a good contrast pattern.
The contrast pattern of a well-cut oval when viewed through the table should look like concentric cut-cornered rectangles that I call ‘frames’. These frames will be beveled at the corners but otherwise they should meet at 90-degree angles. Each frame is made up of several virtual facets and what you’re looking for are symmetrical frames, both in the width of frame and in the way the virtual facets return light.
The opposite sides of the diamond should display the same light behavior. What you don’t want are broken frames that are caused by distorted virtual facets or weak light return. Even light leakage is preferable to distorted frames if it’s symmetrical. You also don’t want frames that are returning light to be too thin so that all you see are frames that are obstructing light. This will cause an effect that is similar to the bow tie in an oval diamond.
Table
Emerald cuts tend to have large table facets. A large table is important in an emerald because it maximizes the size and number of virtual facets that can be seen. Choose a table size that is 60% or larger. The actual size of the table you can get away with will be limited by the height of the crown that you want.
The physical and optical symmetry of an emerald cut diamond is very important. If the plane of the table is not parallel to the culet and the edges of the table are not straight, then neither will any of the virtual facets that create the overall contrast pattern in the diamond.
One of the consequences of having a large table is that the girdle reflection is easily seen through the table facet. However, because the girdle of an emerald cut is essentially made up of a single large facet on each side, you don’t get a problem with the fisheye effect. It does however mean that if your setting covers the longer edge of the stone, then there is a chance you will see a reflection of it in the center of the stone especially when you tilt it.
Crown
A classic emerald cut diamond has a three-step crown. If a stone has more than three steps then GIA will no longer consider it an emerald cut but simply as a step cut.
Generally speaking, the crown height of any diamond has the most impact on its fire. The ideal total crown height of an emerald should be similar to all other diamonds so ideally around a 15% crown height is what I would look for. Having said that, the height of the crown in an emerald is not as important as it is in a round brilliant and so as long as the crown height is above 10%, there will be more important factors like how the angles of the crown and pavilion facets actually come together to create the contrast pattern of the diamond.
Pavilion
The pavilion of a standard emerald cut has a four-step pavilion. The ideal total depth of an emerald cut diamond is close to that of other brilliants including the round. This is because the overall crown and the pavilion angles, although stepped, should ideally follow the ideal crown and pavilion angles of a round diamond.
Depending on the length to width ratio of the diamond, the cutter may change pavilion angles slightly to improve light performance. However, if the overall profile of the emerald deviates significantly from that of a round, then you will get a bulging of the pavilion that causes unnecessary weight retention. If you’re not paying attention, the cutter can hide up to 5% of the weight of the diamond here and you might not even notice it.
Unfortunately, in the real world, cut is primarily driven by economic considerations so what you tend to find in all fancy shape diamonds are stones that are cut with deeper pavilions. The last step of pavilion facets is key because it determines the brightness in the center of the diamond. You can check for a bulging pavilion with a 360 video and correct pavilion angles using an idealscope or ASET image.
When searching for diamonds, most vendors won’t allow you to just filter by pavilion depth, so you’ll have to use the total depth. The ideal total depth will actually vary depending on the thickness of the girdle and the height of the crown, but you are likely going to be looking at pavilion depths that are deeper than 43%. If we also assume that the girdle thickness will be around 4.5% and a 15% crown, then you’re looking at a total depth of at least 62.5%.
The pavilion depth can be up to 50% and still produce a beautiful looking emerald so I would place a filter from 60% to 70% for the total depth to ensure you’re not missing any potentially good diamonds.
Corners
The corners of an emerald cut diamond are beveled. You should pay more attention to the corners because a smaller corner means the diamond will retain more weight. Too large of a corner and you also start to affect the aesthetics of the stone.
Look at both the size of the corner and the angle with which it meets the edge. The ideal corner will be set at a perfect 45-degree to the edge. If the angle is off, then this should be taken into account of in the symmetry grade of the diamond.
You should always request an image of the diamond when you’re purchasing online. It’s even more important in emerald cut diamonds because the size of the corners can have a big impact on the look of the stone and you cannot determine this information from the lab report alone.
Girdle
If you do manage to get a good look at the corners, you will likely also notice that the girdle is thicker at that point. Since beveled corners are usually designed to protect the weaker points in a fancy shape diamond, the graded girdle thickness will be judged by the thickness of the girdle at the long edge and not the corners.
There’s no real need to get an especially thick girdle at the corners though because that thicker girdle is a source of weight retention in the diamond. Unfortunately, you will tend to find that emerald cut diamonds have thicker girdles in general as it is an easy way for the cutter to push the diamond above a certain per carat price point.
In an emerald cut diamond, 100% of the girdle is measured as the shorter dimension, which is the width of the diamond. As with all diamonds, all proportions are measured as a percentage of the girdle.
Culet
The culet of an emerald cut is actually a line rather than a point. In gemology, this line is called a keel edge. The center of the culet should be at the center point of the stone. The length of the culet becomes important, as a longer culet will make the pavilion angle steeper. As a general rule of thumb, the length of the culet should not be longer than the width of the diamond.
In an Asscher Cut, there is a culet and it’s actually a sizable one in the original Asscher. In modern Asschers, the culet is pointed so the culet is one way to identify these antique diamonds which are rare and expensive.
ASET
Once you’ve found an emerald cut diamond with an outline you like, a good contrast pattern, and ideal proportions, the next step will be to verify its light performance using an ASET. The ASET is not a perfect tool but it is one that is available to you. If you can’t get an ASET, then you should probably walk away from the stone and the seller. Patience is key when looking for a fancy shape diamond and it can definitely be a frustrating process.
The ASET only reveals the light performance from the face up view of the diamond under a specific angle of obstruction and lighting condition. What the ASET is good for is revealing how the light return is structured. As for all diamonds, what you’re looking for is little to no light leakage, and as much of a balance as you can between strong light return, weak light return, and obstruction. Expect more green than red or blue in the image and this is normal for a fancy shape diamond.
360 Video
Having a 360 video is very useful for evaluating an emerald cut beyond evaluating the extent of the pavilion bulge. Tilt the diamond slowly if you can and look at the play of light. A faster play of light makes for a more interesting diamond and even in an emerald where you expect light to linger on for a bit longer, if the diamond isn’t dynamic enough then you’re going to be disappointed with how it sparkles.
Don’t forget that a video is also useful for evaluating color and clarity. You should aim for a color above what you would want in a round since the emerald cut is designed for color retention.
Since the performance of emerald cut diamonds depend so much on the virtual facets, larger emerald cut diamonds tend to perform much better than smaller ones. This is likely the reason why emerald cut diamonds are more popular in the three carat or above range. In these larger stones, I wouldn’t recommend going below an I-colored stone and I generally stick to this recommendation even for smaller stones.
Clarity is also more important since the the stone is less busy, has larger facets, and light tends to linger so inclusions are more likely to be visible. I would recommend sticking to VS2 and above for these stones if you’re concerned at all about clarity. Although you may end up paying more for a higher color and clarity in an emerald cut stone, the price per carat of a emerald cut stone is lower than a round so you may find that you will still be saving money.
Conclusion
A well-cut emerald cut diamond is one with a high degree of optical symmetry and a good contrast pattern. The diamond should have a good balance of light return and light obstruction with a bright center.
An emerald cut diamond should not have an excessive pavilion bulge and the length to width ratio should be between 1.45 and 1.6. A well-cut Asscher Cut diamond will have large corners, a small table, and a high crown and a length to width ratio within 1.05. If you’re looking for a step-cut diamond with ideal light performance, then you should definitely check out the Royal Asscher or the Octavia.
As with most fancy shape diamonds, picking an emerald cut diamond online can be very tough. I’ve found the hardest thing to be getting around the fact that there are so many poorly cut diamonds out there so it’s very easy to just give up and settle for a mediocre stone. If you find that you need some help through the process then please feel free to contact me and I’ll do my best to guide you along.


